텐서플로우 자격증 준비를 위한 공부를 하려고 합니다.
시험 문제 유형은 아래와 같으며 coursera와 udacity 강의를 보고 준비하려고 합니다.
-
Category 1: Basic / Simple model
-
Category 2: Model from learning dataset
-
Category 3: Convolutional Neural Network with real-world image dataset
-
Category 4: NLP Text Classification with real-world text dataset
-
Category 5: Sequence Model with real-world numeric dataset
www.udacity.com/course/intro-to-tensorflow-for-deep-learning--ud187
Intro to TensorFlow for Deep Learning | Udacity Free Courses
Developed by Google and Udacity, this course teaches a practical approach to deep learning for software developers.
www.udacity.com
www.coursera.org/learn/introduction-tensorflow/home/welcome
Coursera | Online Courses & Credentials From Top Educators. Join for Free | Coursera
Learn online and earn valuable credentials from top universities like Yale, Michigan, Stanford, and leading companies like Google and IBM. Join Coursera for free and transform your career with degrees, certificates, Specializations, & MOOCs in data science
www.coursera.org
Category 4: NLP Text Classification with real-world text dataset
필요한 라이브러리들을 import한 다음에 json.load()를 이용하여 sarcasm 데이터를 불러옵니다.
import tensorflow as tf
import numpy as np
import urllib
import json
import matplotlib.pyplot as plt
%matplotlib inline

from tensorflow.keras.preprocessing.sequence import pad_sequences
from tensorflow.keras.layers import Embedding, LSTM, Dense, Bidirectional
from tensorflow.keras.preprocessing.text import Tokenizer
url = 'https://storage.googleapis.com/download.tensorflow.org/data/sarcasm.json'
urllib.request.urlretrieve(url, 'sarcasm.json')
with open('sarcasm.json', 'r') as d:
datas = json.load(d)article_link : 신문기사의 링크
headline : 신문기사의 헤드라인
is_sarcastic : 풍자(비꼬는) 여부 (풍자면 1 아니면 0)
datas[:5]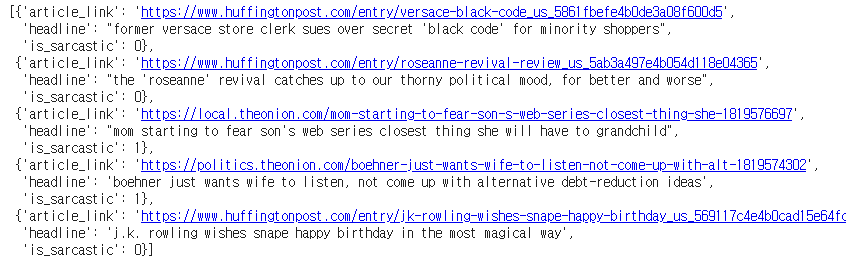
데이터 셋 구성을하기위해 피처는 sentences로 라벨은 labels로 빈 리스트를 생성하고 데이터셋을 구성해줍니다.
sentences = []
labels = []

for data in datas:
    sentences.append(data['headline'])
    labels.append(data['is_sarcastic'])

print(sentences[:5])
print(labels[:5])
train과 validation set을 분리하기 위해서 20000개를 기준으로 데이터셋을 분리합니다.
training_size = 20000

train_sentences = sentences[:training_size]
train_labels = labels[:training_size]

valid_sentences = sentences[training_size:]
valid_labels = labels[training_size:]
전처리 과정으로 Tokenizer 정의를 합니다. 단어의 토큰화를 진행합니다.
num_words : 단어의 max 사이즈를 지정합니다. 가장 빈도수가 높은 단어부터 저장합니다.
oov_token : 단어 토큰에 없는 단어를 어떻게 표기할 것인지 지정해줍니다.
vocab_size = 1000
oov_tok = "<OOV>"

tokenizer = Tokenizer(num_words=vocab_size, oov_token=oov_tok)
Tokenizer로 학습시킬 문장에 대한 토큰화를 진행합니다.
fit_on_texts로 학습할 문장에 대하여 토큰화를 진행합니다.
tokenizer.fit_on_texts(train_sentences)문장을 토큰으로 변경합니다.
texts_to_sequences: 문장을 숫자로 변환합니다. Train과 valid 데이터셋 모두 적용시켜줍니다.
train_sequences = tokenizer.texts_to_sequences(train_sentences)
valid_sequences = tokenizer.texts_to_sequences(valid_sentences)

print(train_sequences[:5])
시퀀스의 길이를 맞춰줍니다.
maxlen : 최대 문장 길이를 정의합니다. 문장길이보다 길면 잘라냅니다.
truncation : 문장의 길이가 maxlen보다 길 때 앞을 자를것인지 뒤를 자를것인지 정해줍니다.
padding : 문장의 길이가 maxlen보다 짤을 때 채워줄 값을 앞을 채울지 뒤를 채울지 정의합니다.(pre - 앞부분을 채워줄때 사용)
max_length = 120
trunc_type='post'
padding_type='post'

train_padded = pad_sequences(train_sequences, truncating=trunc_type, padding=padding_type, maxlen=max_length)
valid_padded = pad_sequences(valid_sequences, truncating=trunc_type, padding=padding_type, maxlen=max_length)
train_padded.shape
(20000, 120)
label 값을 numpy array로 변환해줍니다. model이 list type을 받아들이지 못하기 때문에 numpy array로 변환해줍니다.
train_labels = np.asarray(train_labels)
valid_labels = np.asarray(valid_labels)
Embedding 레이어 : 고차원을 저차원으로 축소시켜주는 역할
원핫인코딩을 진행햇을때 1000차원으로 표현되는 단어들을 16차원으로 줄여줘서 sparsity문제를 해소해줍니다.
embedding_dim = 16

#변환 전
sample = np.array(train_padded[0])
print(sample)

#변환 후
x = Embedding(vocab_size, embedding_dim, input_length=max_length)
print(x(sample)[0])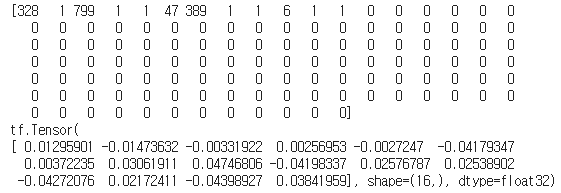
Sequential 모델을 만들어주고 확인해봅니다.
model = tf.keras.Sequential([
                             tf.keras.layers.Embedding(vocab_size, embedding_dim, input_length=max_length),
                             tf.keras.layers.Conv1D(128, 5, activation='relu'),
                             tf.keras.layers.GlobalMaxPooling1D(),
                             tf.keras.layers.Dense(24, activation='relu'),
                             tf.keras.layers.Dense(1, activation='sigmoid')])
model.summary()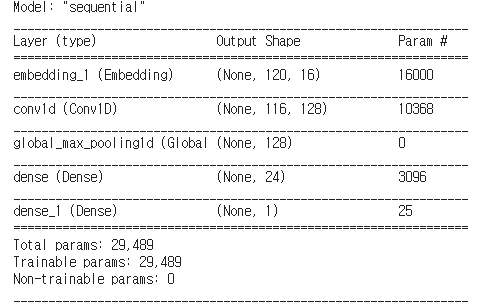
optimizer는 최적화가 잘 이루어지는 알고리즘인 adam 옵티마이저를
loss는 이진 분류이기 때문에 binary_crossentropy를 사용해서 컴파일 합니다.
model.compile(loss='binary_crossentropy',
              optimizer='adam',
              metrics=['accuracy'])
학습을 진행하기 전에 ModelCheckPoint를 생성해줍니다
checkpoint_path = 'best_performed_model.ckpt'
checkpoint = tf.keras.callbacks.ModelCheckpoint(checkpoint_path,
                                                save_weights_only=True,
                                                save_best_only=True,
                                                monitor='val_loss',
                                                verbose=1)
history = model.fit(train_padded,
train_labels,
epochs=50,
callbacks = [checkpoint],
validation_data=(valid_padded, valid_labels),
verbose=1)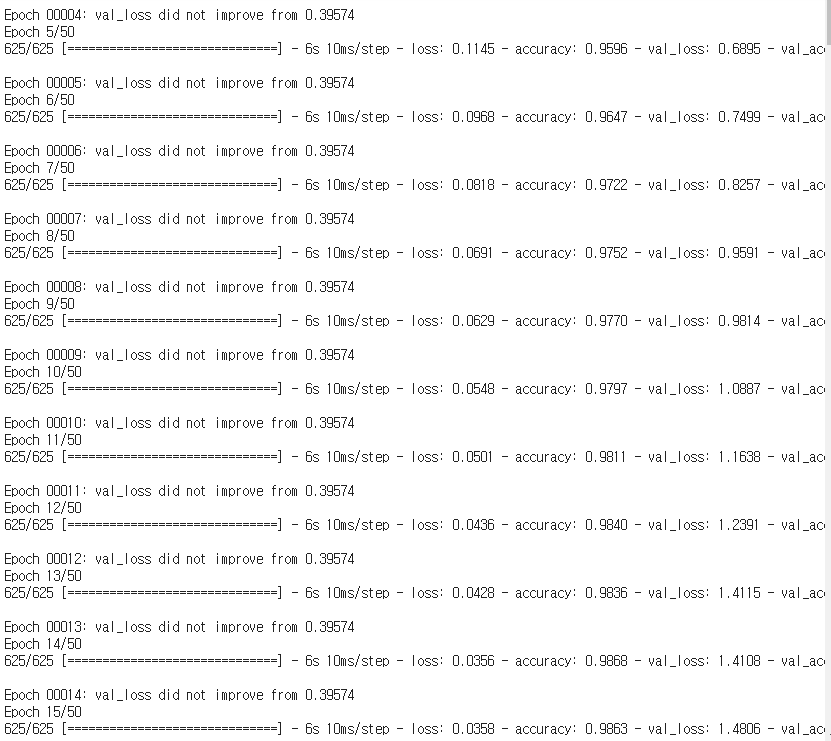
학습이 완료된 이후에는 load_weights를 반드시 해줍니다.
model.load_weights(checkpoint_path)plt.figure(figsize=(12, 9))
plt.subplot(2, 1, 1)
plt.plot(history.history['accuracy'], label='Training Accuracy')
plt.plot(history.history['val_accuracy'], label='Validation Accuracy')
plt.legend(loc='lower right')
plt.title('Training and Validation Accuracy')
plt.subplot(2, 1, 2)
plt.plot(history.history['loss'], label='Training Loss')
plt.plot(history.history['val_loss'], label='Validation Loss')
plt.legend(loc='upper right')
plt.title('Training and Validation Loss')
plt.xlabel('epoch')
plt.show()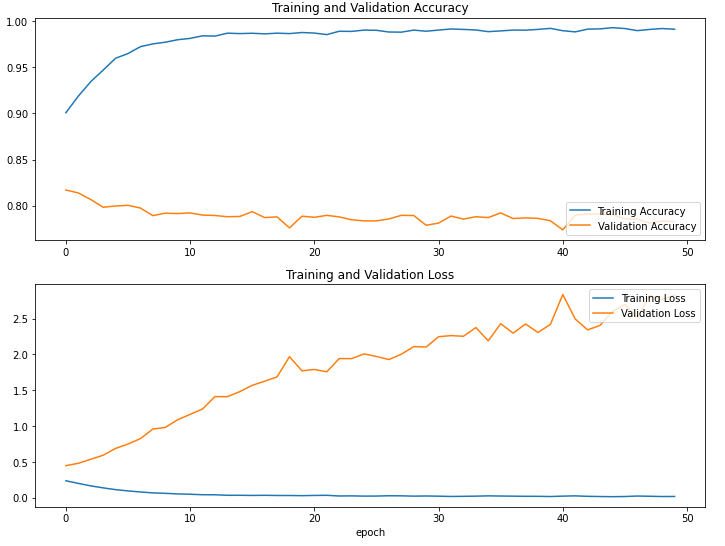
'Data Analysis > Tensorflow' 카테고리의 다른 글
| [tensorflow] sunspots (0) | 2021.01.04 |
|---|---|
| [tensorflow] horses_or_humans (2) | 2021.01.02 |
| [tensorflow] Fashion MNIST (0) | 2020.12.30 |
| [tensorflow] Basic / Simple model (0) | 2020.12.30 |
| [tensorflow] pycharm 설치 및 환경설정 (0) | 2020.12.18 |